Solar project – Suppliers

After getting the permit, I needed to get moving.  Found a company in West Palm Beach called  Inverter Supply which would sell me the Snap-N-Rack ground mounting hardware at a reasonable price. Ordered everything from them with the exception of the end panel hold-down mounts.  I found those on Ebay for much cheaper.  Had everything in a week or so.  Was interesting watching the semi driver attempt to make a 999 point U-turn on the dirt road I live on.  I had told the dispatch to have the driver call me when he was at the end of my road and I would meet him with my trailer.  Wish I had a video.

Next was the rebar and 1 1/2″ galvanized pipe. Used a company named  Surplus Steel out of Orlando.  Excellent prices compared to the local steel outfits in my area.  They even deliver for only $10.  That was about 1000 lbs of pipe and rebar. 

Ordered PV cable from Wire and Cable Your Way. 

Used local electrical supply for the remaining wiring.  10AWG for the home run back to the inverter and 6AWG for grounding.  I had the 8AWG and 6AWG wire for the connections to the sub-panel and disconnect.

Ordered A/C disconnect panel from Amazon. Labels from PVLabels.com

More to come…


Solar project – Design and Permitting

From the beginning that this was going to be a ground mounted system and not be mounted on my home or my barn.  Since my barn is about 200′ from the house and has 240v/70amp service to it from the home’s 200amp service panel, I decided to place the inverter in the barn and back feed from there.

Let me say this, I did not originally plan on this being a 100% DIY project.  I had reached out to numerous Solar contractors within 150 miles for engineering and pricing for ground mount, and design.  I understand they are in the business to sell complete systems, but they were @#(*&#*& useless!  If I had millions to build a system, I would not give one of them a freaking penny.  Hell, I even tried to pay them to install what I had.  So, “Screw’em, I’ll do it myself!” 

And so the adventure began…

I had all the engineering documents from Snap-N-Rack and used their configurator web application to layout the physical mounting for the array.

Now I had to find software to do the electrical design for the permit.  I’m a geek, techie and an major DYI’er, so I’m not totally unaware of electrical requirements, but I do not know the 2015 NEC codes and really didn’t want to learn them either.  So, famously said, “Nobody gots time for that!” 

My google-fu lead me to a site called solardesigntool.  At the time, and may still be, it was free for 30 days.  The site is amazing, I used the 30 days to learn how to design my system.  The owners of the site are VERY helpful and answered all my dumb ass questions.  The system worked perfectly with some minor issues.  (1) It was unable to do a complete 1 line drawing when feeding a sub-panel (the one in the barn) and (2) it did not have SNAP-N-RACK inventory information in the system.  Anyway, that was minor.  The data generated included all wiring gauges needed for compliance to NEC codes (2015? Maybe 2017?) I paid for an extra month just to show my support for the company.

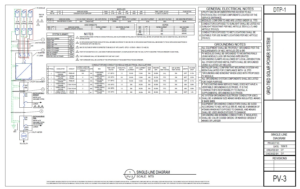
The tool generated PDFs for permitting and also an autocad output of the 1 line drawing.  Using a free autocad like program, I was able to modify the drawing to include the sub-panel in the barn in the drawing.  Used acrobat pro to modify the PDFs to include the SNAP-N-RACK diagrams and engineering.

I must have gone over the permitting package that I was going to submit to the county 100 times.  Finally I said screw it and applied for the permit.  I did so on a Friday afternoon around 2-3pm.   Come Monday morning, I received an email that my permit was issued and I could some pick it up.  Holy shit, this just got real…


Solar Project – Introduction

Always wanted to build a solar array for the house, but  due to cheap electric in Florida, I could not  economically justify. Being the sunshine state one would think there would be incentives to “Go Solar”… There isn’t.  🙁

One day a friend called and told me that he found a system at a very reasonable price. Long story made short. I picked up a used system consisting of 36-230Watt 60 cell panels, all racking, wiring and a SMA Sunnyboy 7000kw grid tie inverter. The price was in the 25 cent per watt range. The system was only 7 years old and spent the last 5 in a workshop.

Quick check with FPL, the local power company, to see if I would be allowed to install a grid-tie system – GOOD TO GO!  Checked the county regs on installing – GOOD TO GO!  Purchased, then spent the next 6-8 months trying to find someone to create the diagrams needed for permitting.  Gave up and decided to do it myself.  Oh, the fun of learning cad programs.  The person that came up with the user interface was on crack.  Anyway, things were going well until I hit my 1st snag…

I discovered that over the years the location where I live has became a 150MPH wind rated area.  Meaning, just about anything you want to build needs to be able to handle 150MPH winds for some predetermined period of time.  Well hell, the racking I acquired was only rated at 120MPH on a good day.

After a week or so of Googling my fingers off I found racking for my ground mount from Snap-N-Rack.  Main reasons for going with them was (1) They had Florida Engineering certifications (2) Price and (3)  They have a really nice configuration tool that accessible online.

More to come…

Sometimes it just doesn’t pay to try to save money…

I’m a geek, I own 5 acres, geese, chickens and a damn cow… So I have a tractor. It’s a small Kubota L2250 that looks like crap but runs just fine. This year I decided to replace the clutch(es), replace front end bushings, change hydraulic and oil/filters etc.

When I went to change the bushings on one of the front spindles I noticed bad wear from the bearing going bad so I decided to order a new spindle. Well, Kubota REALLY loves their stuff. $235.00! Ouch! More digging on the internet lead me to a tractor supply company in Kansas. They had one for $135.00. Hell yes!

The part arrived 5 days later, fit perfectly… (you know where this is going, don’t you?)

Well, after 2-3 hours of using the tractor, the spindle broke! Newton’s 1st law of motion worked as expected, tractor stopped, I didn’t. Ended up on the ground next to the front tire, which was also lying on the ground. Lucky for me I was only going about 2-3 MPH.

Contacted the company to inform them of the spindle’s demise and to see what options I had for replacement or refund. The response I received was not what I was expecting. I got a,
“Looks like you overloaded the tractor and there’s not much we can do”

Damn! This is SMALL tractor with a SMALL bucket. The other spindle is 25 years old! After 3-4 days of going back and forth they said they will refund my money. In the meantime I ordered the part of Kubota and have installed it. What a difference in the quality. So far, so good after 8 hours of running the tractor.


(left – Kubota, right – After market)

Moral of the story, sometimes it doesn’t pay to be cheap. 🙂

Asterisk to the Rescue!

Problem 1: Lack of attendance at our homeowners meetings due to no one remembering when the meeting is…

Problem 2:  It was the secretary’s responsiblity to do the calling…

Bigger Problem: I’m the secretary...

Solution:  Use asterisk to out dial to the members and play a recorded messages.

Damn, I love technology!  Created a mysql database of all the members, containing first/last name, phone number, status, last time called and an opt-out flag. Next, threw together am outbound dial plan, to check for human or machine answered calls, update the database with the call’s outcome.  Added menu to allow user to replay message, opt-out of receiving future messages and allow user to said (by pressing 3) they might attend the meeting. Finally, wrote a quick php program to create  call files and to feed them to asterisk via /var/spool/asterisk/outgoing. The program is called by a crontab entry, but only does it’s thing second tuesday of the month at 12:00 noon.  Added code to check that only 1 outbound call was active at any one time.  This is due to the licensing of the voice font (Cepstral) that I use.  I could not see spending $129 to license 2 outbound calls to be active at one time.  So what if it it takes hour or so to call the members.

The dialplan:

I know that I should make a change to allow for a gosub for the main “text” of the message, since the HUMAN-ANSWERED and MACHINE-ANSWERED message is 99% the same, the only difference is that the MACHINE-ANSWERED message skips the menu options.

[outcallv2]
 exten => s,1,MYSQL(Connect connid localhost dbuser dbpassword DATABASE)
 exten => s,n,GotoIf($["${connid}" = ""]?error,1)
 exten => s,n,MYSQL(Query resultid ${connid} Update Members SET Status='DIALING' where Id=${RecID})
 exten => s,n,NoCDR
 exten => s,n,Answer
 exten => s,n,PlayBack(en/silence/halfsecond)
 exten => s,n,AMD
 exten => s,n,Goto(Status-${AMDSTATUS})
 exten => s,n(Status-HUMAN),Swift("Hello, this is an automated reminder from Homeowners Association.")
 exten => s,n,MYSQL(Query resultid ${connid} Update Members SET Status='HUMAN ANSWERED',LastCalled=now() where Id=${RecID})
 exten => s,n,Swift("This reminder is intended for ${FirstName}. The meeting is tonight at 7 P.M. at the Beer Garden on Lake Drive.",500,0)
 exten => s,n,Swift("Press 1 to listen again. Press 2 to be removed from future calls. Press 3 if you think you will be attending",4000,1)
 exten => s,n,Goto(Done)
 exten => s,n(Done),MYSQL(Disconnect ${connid})
 exten => s,n,Goto(error,2)
 exten => s,n(Status-MACHINE),WaitForSilence(1000)
 exten => s,n,MYSQL(Query resultid ${connid} Update Members SET Status='ANSWER MACHINE',LastCalled=now() where Id=${RecID})
 exten => s,n,Swift("Hello, this is an automated reminder from Homeowners Association.")
 exten => s,n,Swift("This reminder is intended for ${FirstName}. The meeting is tonight at 7 P.M. at the Beer Garden on Lake Drive.",400,0)
 exten => s,n,Swift("Thank you")
 exten => s,n,Goto(Done)
 exten => s,n(Status-NOTSURE),MYSQL(Query resultid ${connid} Update Members SET Status='HUNG UP',LastCalled=now() where Id=${RecID})
 exten => s,n,Goto(Done)
 exten => s,n(Status-HANGUP),MYSQL(Query resultid ${connid} Update Members SET Status='NOT SURE',LastCalled=now() where Id=${RecID})
 exten => s,n,Goto(Done)
 exten => 1,1,Goto(s,Status-HUMAN)
 exten => 2,1,Swift("You will no longer receive reminders.")
 exten => 2,n,Swift("Thank you",500,0)
 exten => 2,n,MYSQL(Query resultid ${connid} Update Members SET CallReminder='N' where Id=${RecID})
 exten => 2,n(Done),MYSQL(Clear ${resultid})
 exten => 2,n,Goto(s,Done)
 exten => 3,1,Swift("Great! See you there.")
 exten => 3,n,Goto(s,Done)
 exten => error,1,NoOp(Connection error - Ack!)
 exten => error,2,Hangup

Example of a call file:

Channel: SIP/3215551212@mysipvendor
MaxRetries: 2
RetryTime: 3
WaitTime: 60
Context: outcallv2
Extension: s
Priority: 1
Setvar: FirstName=Dan
Setvar: RecId=1310518

The “program” that runs every Tuesday: 

<?php

$dbHost='localhost';
$dbDatabase='DBNAME';
$dbUser='dbuser';
$dbPassword='dbpassword';

function ErrPrint($str)
{
	print "$str\n";
}

function dbConnect()
{
	global $dbHost,$dbUser,$dbPassword,$dbDatabase,$dbConn,$debuglevel;
	if (!isset($dbConn))
	{
		$dbConn=mysql_connect($dbHost,$dbUser,$dbPassword);
		if ($debuglevel>2)
		{
			ErrPrint("Creating Database Connection");
			exit();
		}
		mysql_selectdb($dbDatabase,$dbConn);
		if (mysql_errno()<>0)
		{
			trigger_error(mysql_error());
		}
	}
}

function dbDisconnect()
{
	global $dbConn,$debuglevel;
	if (isset($dbConn))
	{
		if ($debuglevel>2)
		{
			ErrPrint("Destroying Database Connection");
		}
		mysql_close($dbConn);
		unset($GLOBALS['dbConn']);
	}
}

function dbEscape($str)
{
	global $dbConn;
	if (isset($dbConn))
	{
		$ret=mysql_escape_string($str);
		return( $ret );
	}
	else
	{
		return( '' );
	}
}

function dbEscapeQ($str)
{
	return( "'".dbEscape($str)."'" );
}

function dbQuery($str)
{
	global $dbConn,$debuglevel;

	if (isset($dbConn))
	{
		if ($debuglevel>2)
		{
			ErrPrint("Query: $str");
		}
		$ret=mysql_query($str,$dbConn);
		if (mysql_errno()<>0)
		{
			trigger_error(mysql_error());
		}
		return( $ret );
	}
	else
	{
		return( null );
	}
}

function dbFinish($str)
{
	global $dbConn;
	if (isset($dbConn))
	{
		mysql_free_result($str);
	}
}

function dbRows($str)
{
	global $dbConn,$debuglevel;
	if (isset($dbConn))
	{
		$cnt=mysql_num_rows($str);
		if ($debuglevel>2)
		{
			ErrPrint("Row Count: $cnt");
		}
		return($cnt);
	}
	else
	{
		return(0);
	}
}

//only run on the 2nd Tuesday of the month
date_default_timezone_set("America/New_York");
$Today=date("d",time());
$MonthYear=date("Y-m",time());
$SecondTues = strftime("%d",strtotime("second tuesday of $MonthYear"));

if ($Today !=$SecondTues)
{
	printf("Today is %s, which is not the second Tuesday of the month\n",$Today);
	exit();
}

dbConnect();
$SqlCmd="SELECT Id,FirstName,LastName,PhoneNumber from Members where CallReminder='Y' order by LastName asc";
$Result = dbQuery($SqlCmd);
$Sequence=0;
if (dbRows($Result)>0)
{
	while ($RowData=mysql_fetch_assoc($Result))
	{
		$FileName=sprintf("/tmp/ToCall/%s_%s",$RowData['LastName'],$RowData['PhoneNumber']);
		$FileList[$Sequence]=$FileName;
		$FileOut[$Sequence]=sprintf("/var/spool/asterisk/outgoing/%s_%s",$RowData['LastName'],$RowData['PhoneNumber']);
		$CurrentCalling[$Sequence]=sprintf("%s %s",$RowData['FirstName'],$RowData['LastName']);
		$FP=fopen($FileName,"w");
		fprintf($FP,"Channel: SIP/%s@MySipProvider\n";,$RowData['PhoneNumber']);
		fprintf($FP,"CallerID: MyCallerId <3215551212>\n");
		fprintf($FP,"MaxRetries: 1\n");
		fprintf($FP,"RetryTime: 120\n");
		fprintf($FP,"WaitTime: 30\n");
		fprintf($FP,"Context: outcallv2\n");
		fprintf($FP,"Extension: s\n");
		fprintf($FP,"Priority: 1\n");
		fprintf($FP,"Setvar: FirstName=%s\n",$RowData['FirstName']);
		fprintf($FP,"Setvar: RecId=%d\n",$RowData['Id']);
		$Sequence++;
		fclose($FP);
	}
	dbFinish($Result);
 }
 
dbDisconnect();
printf("Have %d calls to make.\n",$Sequence);

for ($count=0;$count<$Sequence;$count++)
{
	$Cmd=sprintf("/bin/mv %s /var/spool/asterisk/outgoing/.",$FileList[$count]);
	printf("%2d - Calling %s",$count+1,$CurrentCalling[$count]);
	System($Cmd);
	while (file_exists($FileOut[$count]))
	{
		sleep(10);
		print(".");
	}
	print("\n");
}
print("All Done!\n");
?>
Decided to ditch Joomla and just go with WordPress

Working to get the old website back up, this time in WordPress.  I didn’t need all the bells and whistles Joomla offered and it seems every other update corrupted the database.

I have the old content, but it will take me awhile to get everything back online.  

Still learning. Hell, I can’t figure out how to remove the extra spacing between lines yet. 🙂

Click on Categories or recent posts to see what we’ve been up to.

Dan

Mame Cabinet Project

Cheri would now and then find a Tempest console on Ebay or Craig’s list for sale and would remind me that it would be a great addition to our game room. In every case, the machine would be either too far away to pick up or too expensive. So, I decided to build a Mame console for her Christmas present.

First step was figuring out what type of console I was going to build. I had purchased “Project Arcade – Build your Own Arcade Machine” by John St.Clair (ISBN 0-7645-5616-9) off Amazon a few years ago. I would suggest anyone planning on building a Mame console to purchase a copy for reference. I decided that I wanted to build something a little different than the console design that was included in the book.

I spent some serious time googling various designs until finding a mirror of Oscar Controls website, an arcade hardware manufacturer that is no longer in business. There I found what I was looking for, a slightly more “modern” looking console.

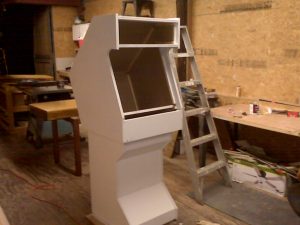
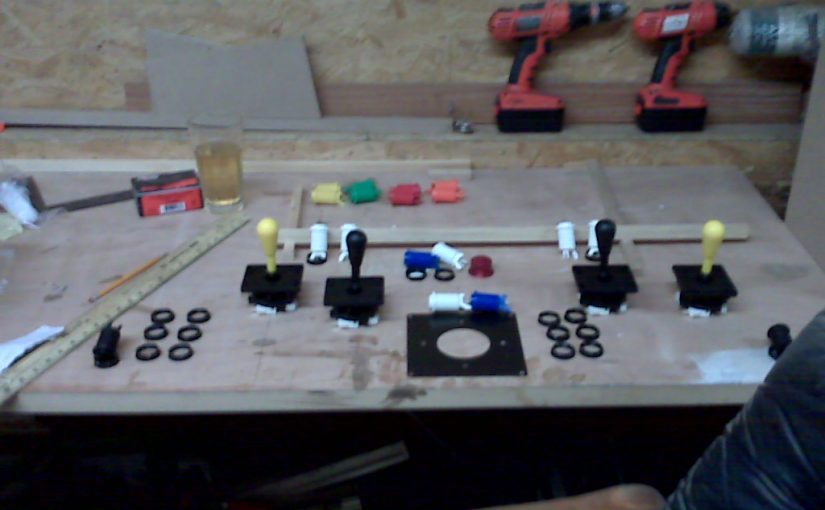
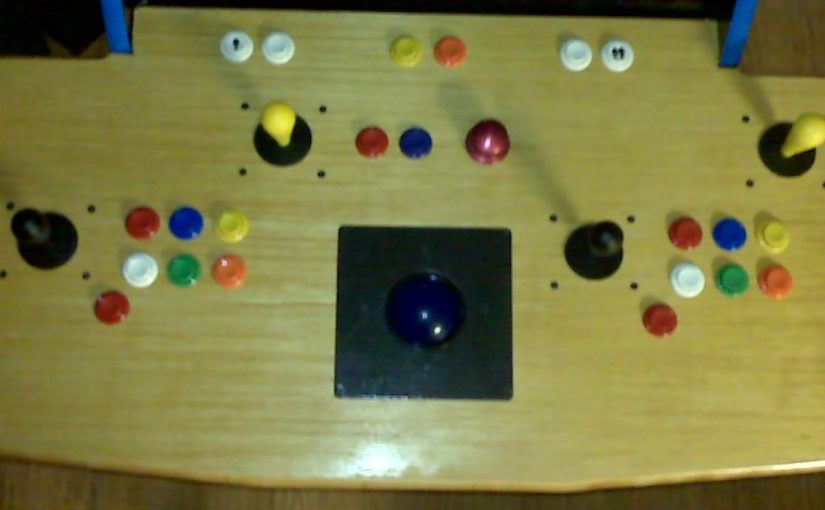
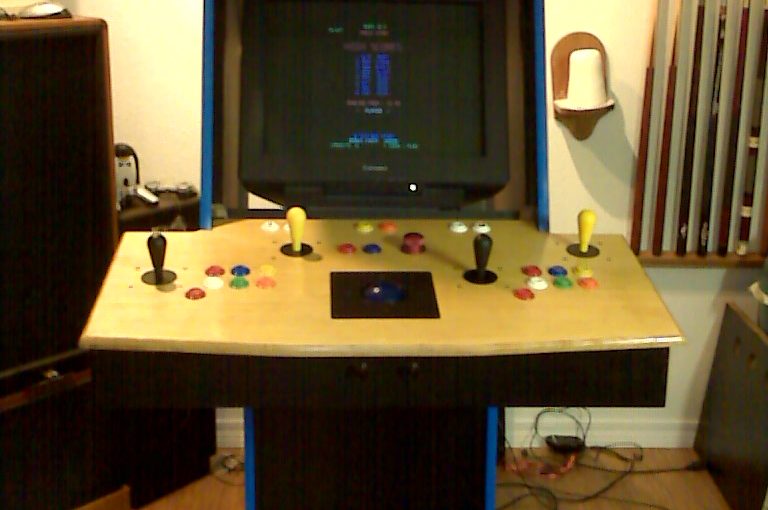
This is the first photo I took after putting the coat of primer to the top and bottom sections of the console. Note that I modified the plans to include a separate console enclosure. The reason is, I wanted dual 4 and 8 way joysticks, a trackball, 7 buttons per player and of course the spinner for Tempest.

Now we’re getting somewhere! I built the console bottom/box out of 12 ply furniture grade plywood instead of MDF board. Was going to polyurethane the console top and box to add some contrast to the semi-gloss black of the cabinet.

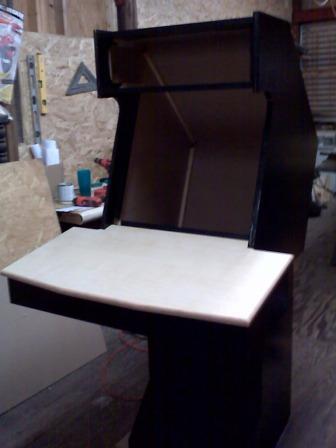
Changed my mind and just painted the console box black to match the cabinet. Console top will be clear polyurethane. This is as far as I could get the cabinet completed before Christmas. 🙁 However, I did have fun Christmas morning when Cheri opened boxes which contained the controller board, spinner and trackball. She figured out what her present was when she opened the trackball. Her stocking on the fireplace mantel was full of 1 1/8″ arcade buttons.

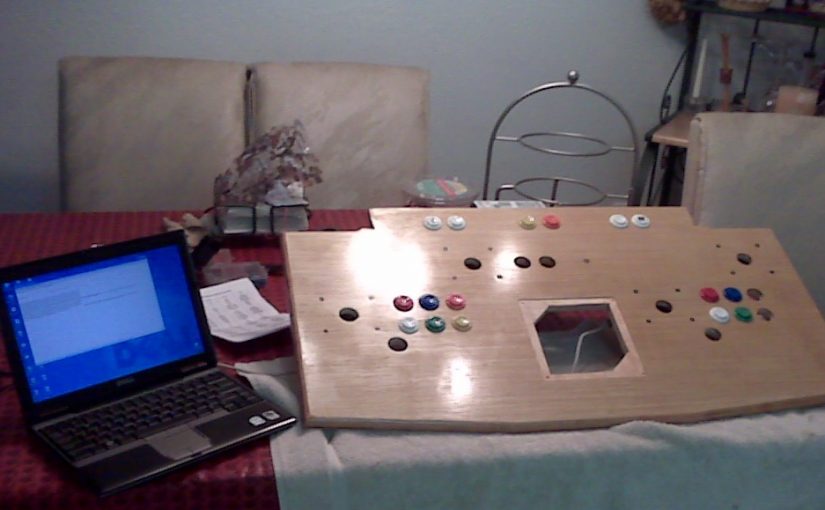
First attempt at laying out the console manually. Gave up quickly! Decided to cheat…

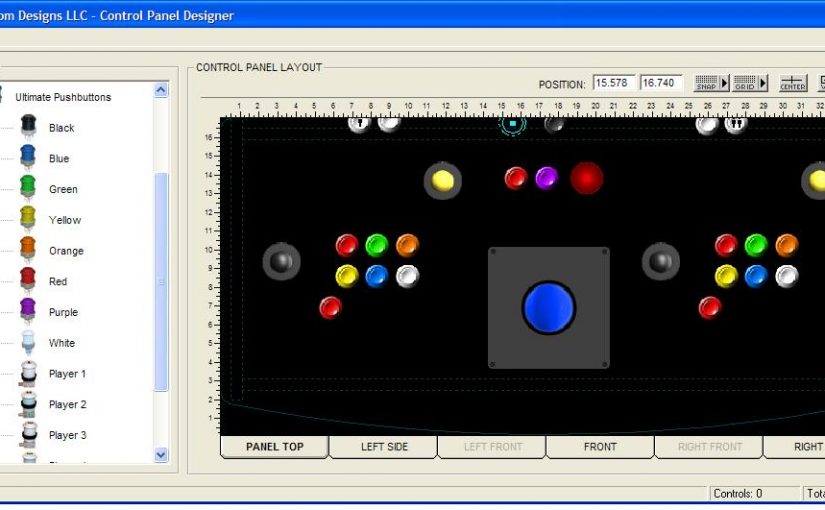
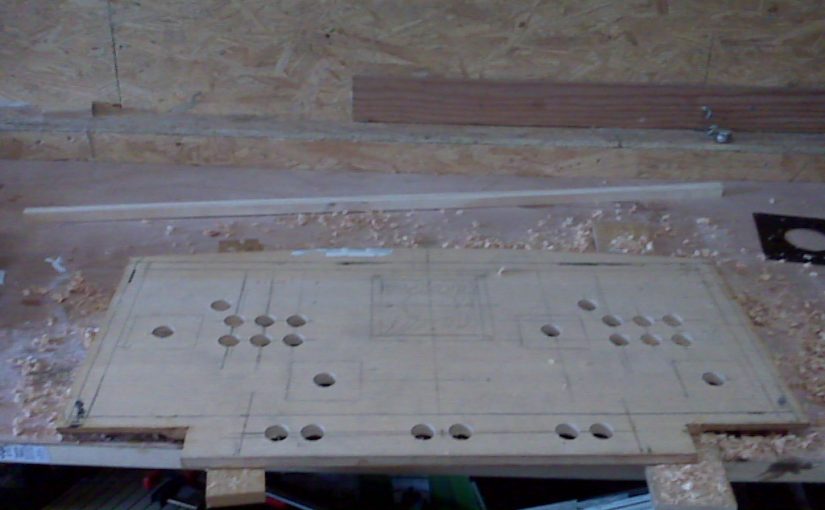
Downloaded a program called Mameroom Designs LLC – Control Panel Designer. The program was written to allow you to custom order a control panel from the company. Used their layout as a base and added controls/buttons as I needed. When it came time to drill on the console top, I used the program’s X/Y measurements to figure out where to drill.

Buy a good 1 1/8″ spade bit to drill your button and joystick holes! Drill 3/4 of the way through on one side, then flip over and drill from the other side for clean holes.

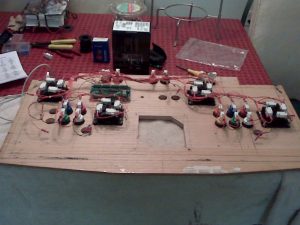
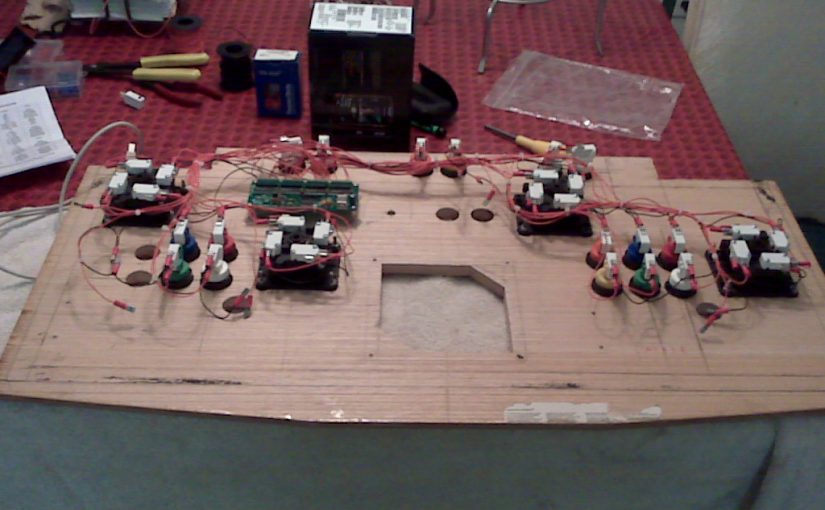
Now for the fun part! Best part is, I get to work in a warm house instead of my workshop in the barn! Wiring the console. Note, I didn’t buy enough buttons! I forgot about buttons for trackball (left/right mouse buttons), pause game, exit game, left/right flippers, and 2 extra Fire/Super-Zapper buttons for Tempest.

Used my laptop and good old notepad to test the buttons/joystick. The USB Input PCB I purchased from an Digital System Design in the UK (off ebay) maps the button presses to keyboard characters/codes. I decided on DSD’s board because, well, it was cheap! Works great.

Suppliers I used:  (update with part links)

  • http://www.twistedquarter.com/ Happ competition 4 way joysticks
  • http://www.twistedquarter.com/ Happ competition 4 way joysticks
  • http://www.twistedquarter.com/ Happ competition 4 way joysticks
  • http://www.twistedquarter.com/ Happ competition 4 way joysticks
  • http://www.twistedquarter.com/ Happ competition 4 way joysticks

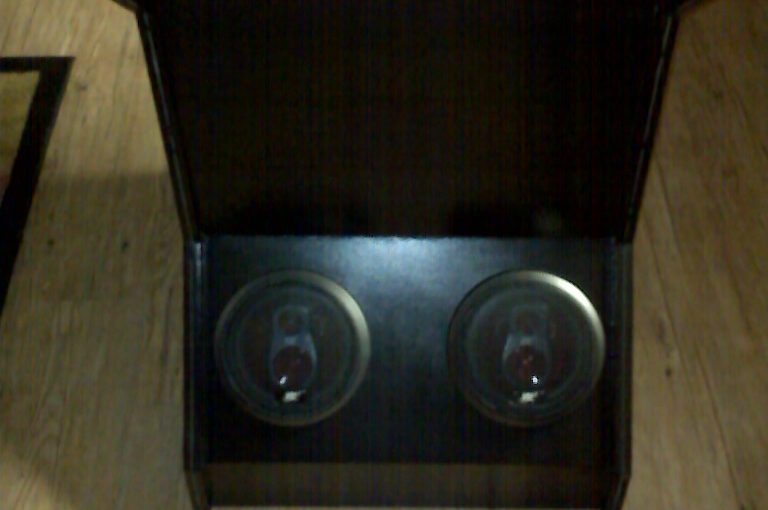
Installed two 6″ 3-way automotive speakers to into the base unit. Plan on installing 2 speakers in the top unit and a sub-woofer in the bottom.

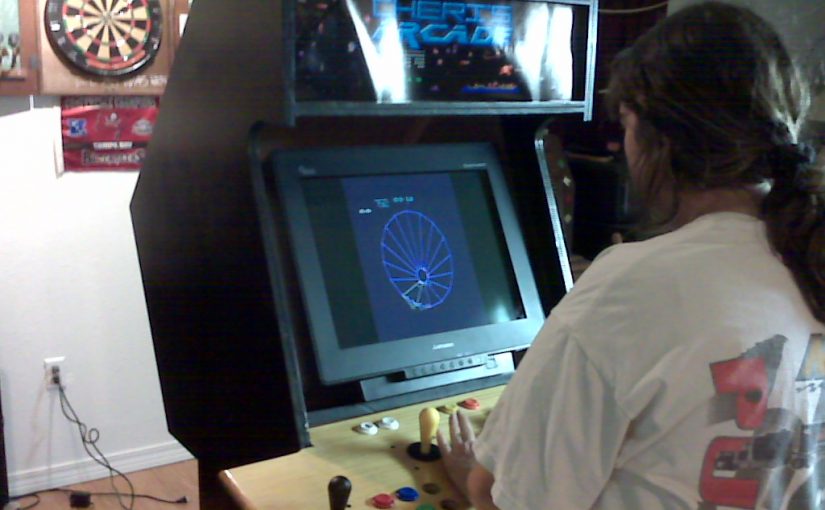
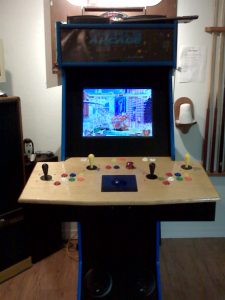
Cheri playing her first game of Tempest. The t-molding and bezel over the 22″ monitor has not been installed yet.

T-moulding installed! Getting it done… Slowly…

Bezel installed. What a pain in the ass that was! Broke two pieces that were suppose to be used for the marquee… Time for another trip to Lowes/Home Depot! All that needs to be done now is install the top unit speakers and install an on/off switch somewhere. Total time to this point? 18 days.