Cheri would now and then find a Tempest console on Ebay or Craig’s list for sale and would remind me that it would be a great addition to our game room. In every case, the machine would be either too far away to pick up or too expensive. So, I decided to build a Mame console for her Christmas present.
First step was figuring out what type of console I was going to build. I had purchased “Project Arcade – Build your Own Arcade Machine” by John St.Clair (ISBN 0-7645-5616-9) off Amazon a few years ago. I would suggest anyone planning on building a Mame console to purchase a copy for reference. I decided that I wanted to build something a little different than the console design that was included in the book.
I spent some serious time googling various designs until finding a mirror of Oscar Controls website, an arcade hardware manufacturer that is no longer in business. There I found what I was looking for, a slightly more “modern” looking console.
- CDP_Setup.exe (Layout) SHA256: EE5C9F2AD835E9502B8EF62D174149B600D16E238C0658F7B2EC1852FF9DD51D
- Mameroomcpd.zip (layout SHA256: EE5C9F2AD835E9502B8EF62D174149B600D16E238C0658F7B2EC1852FF9DD51D
- Cabint Bottom
- Cabinet Top
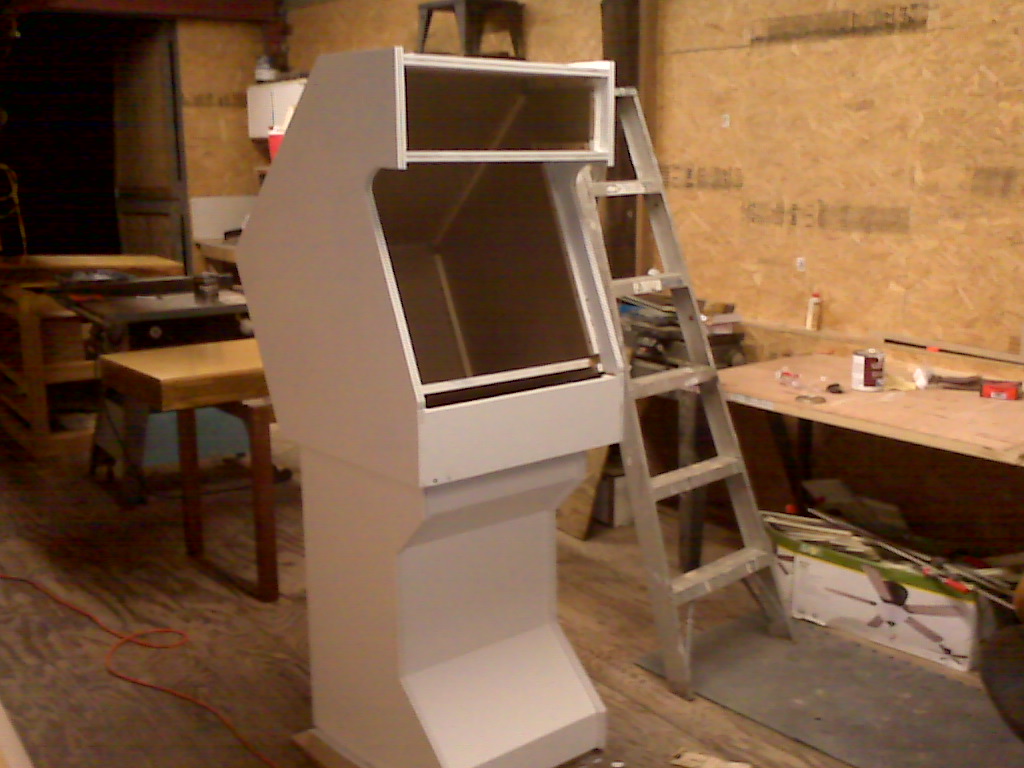
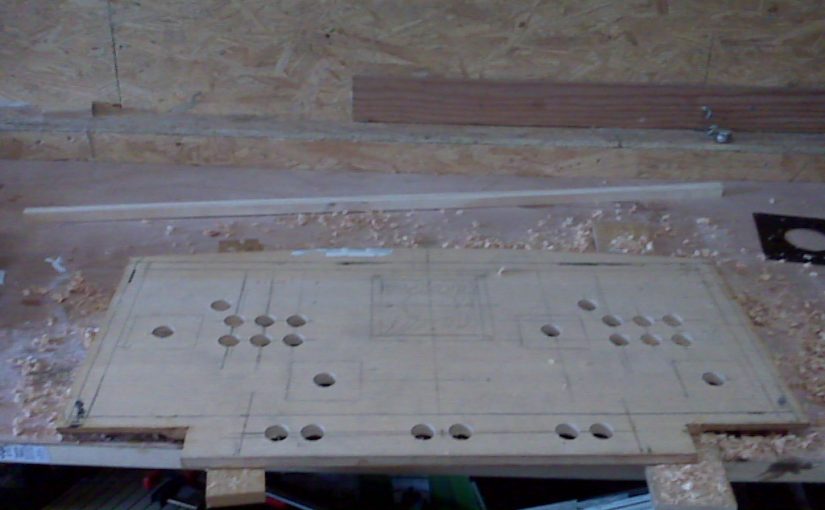
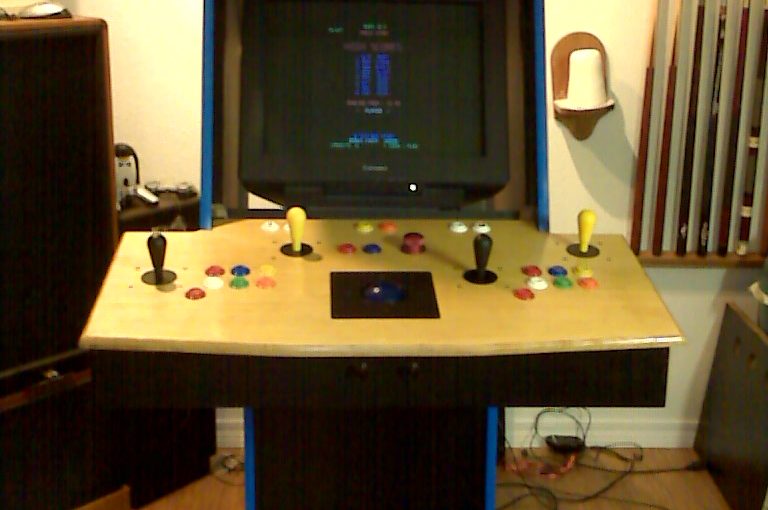
This is the first photo I took after putting the coat of primer to the top and bottom sections of the console. Note that I modified the plans to include a separate console enclosure. The reason is, I wanted dual 4 and 8 way joysticks, a trackball, 7 buttons per player and of course the spinner for Tempest.
Now we’re getting somewhere! I built the console bottom/box out of 12 ply furniture grade plywood instead of MDF board. Was going to polyurethane the console top and box to add some contrast to the semi-gloss black of the cabinet.
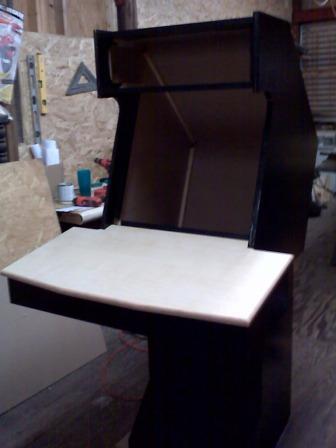
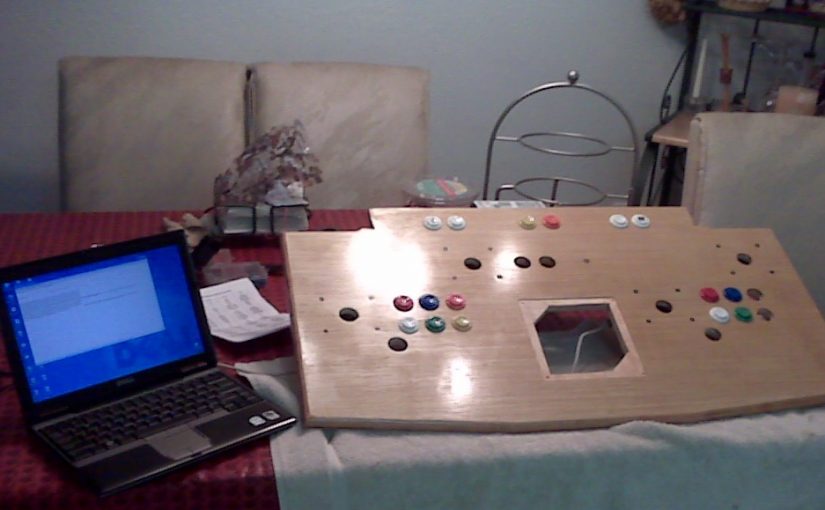
Changed my mind and just painted the console box black to match the cabinet. Console top will be clear polyurethane. This is as far as I could get the cabinet completed before Christmas. 🙁 However, I did have fun Christmas morning when Cheri opened boxes which contained the controller board, spinner and trackball. She figured out what her present was when she opened the trackball. Her stocking on the fireplace mantel was full of 1 1/8″ arcade buttons.
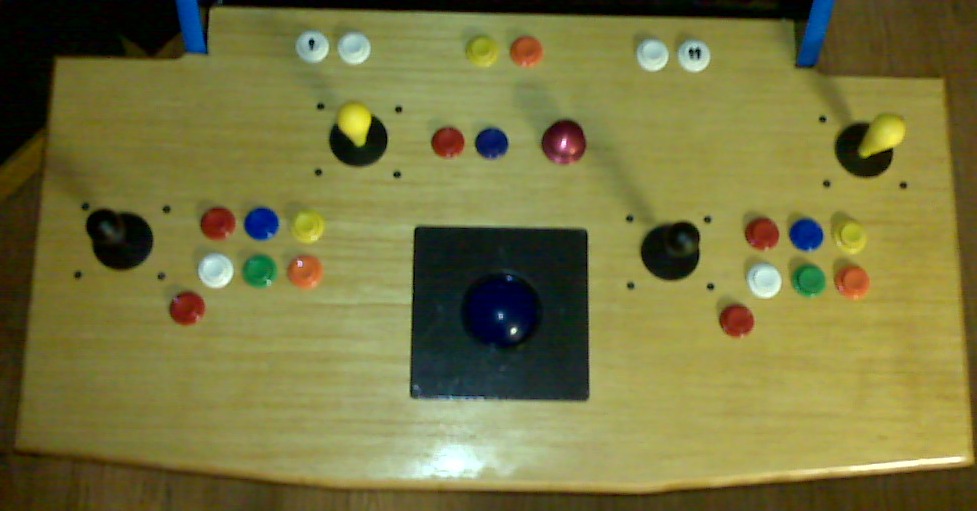
First attempt at laying out the console manually. Gave up quickly! Decided to cheat…
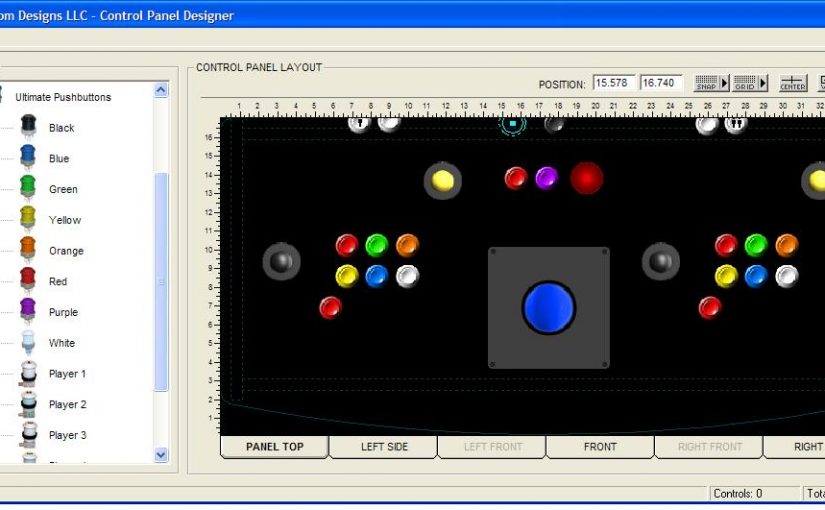
Downloaded a program called Mameroom Designs LLC – Control Panel Designer. The program was written to allow you to custom order a control panel from the company. Used their layout as a base and added controls/buttons as I needed. When it came time to drill on the console top, I used the program’s X/Y measurements to figure out where to drill.
Buy a good 1 1/8″ spade bit to drill your button and joystick holes! Drill 3/4 of the way through on one side, then flip over and drill from the other side for clean holes.
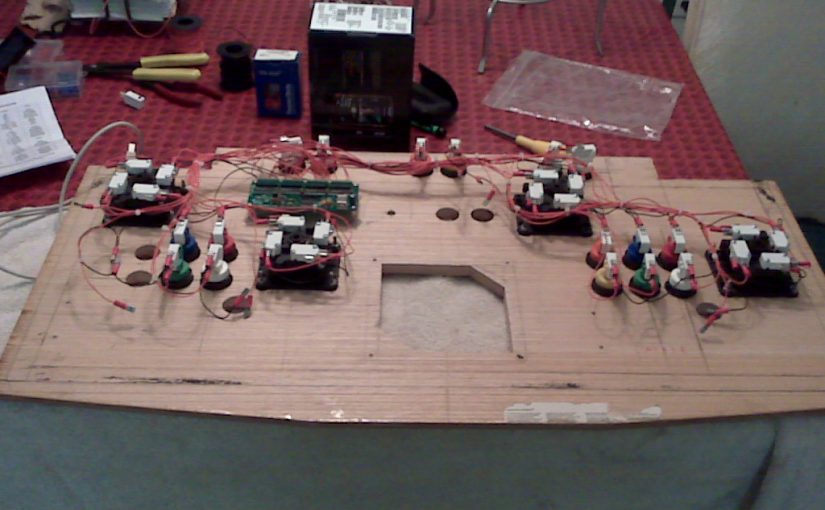
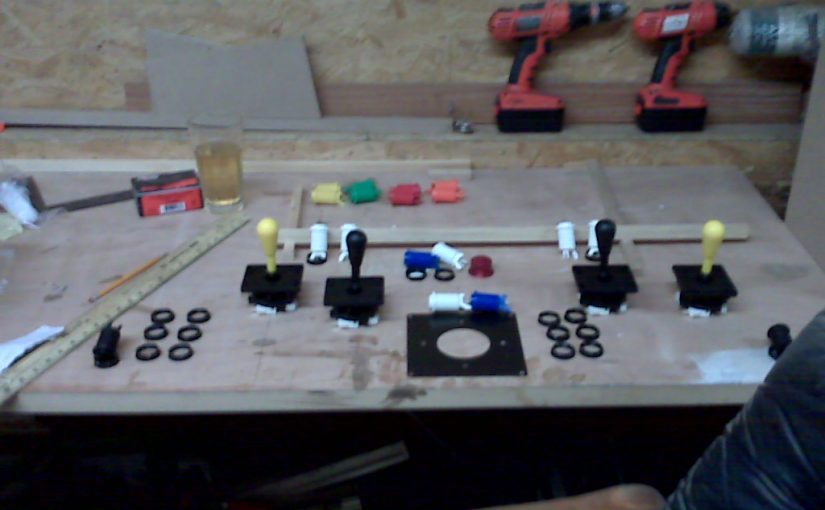
Now for the fun part! Best part is, I get to work in a warm house instead of my workshop in the barn! Wiring the console. Note, I didn’t buy enough buttons! I forgot about buttons for trackball (left/right mouse buttons), pause game, exit game, left/right flippers, and 2 extra Fire/Super-Zapper buttons for Tempest.
Used my laptop and good old notepad to test the buttons/joystick. The USB Input PCB I purchased from an Digital System Design in the UK (off ebay) maps the button presses to keyboard characters/codes. I decided on DSD’s board because, well, it was cheap! Works great.

Suppliers I used: (update with part links)
- http://www.twistedquarter.com/ Happ competition 4 way joysticks
- http://www.twistedquarter.com/ Happ competition 4 way joysticks
- http://www.twistedquarter.com/ Happ competition 4 way joysticks
- http://www.twistedquarter.com/ Happ competition 4 way joysticks
- http://www.twistedquarter.com/ Happ competition 4 way joysticks
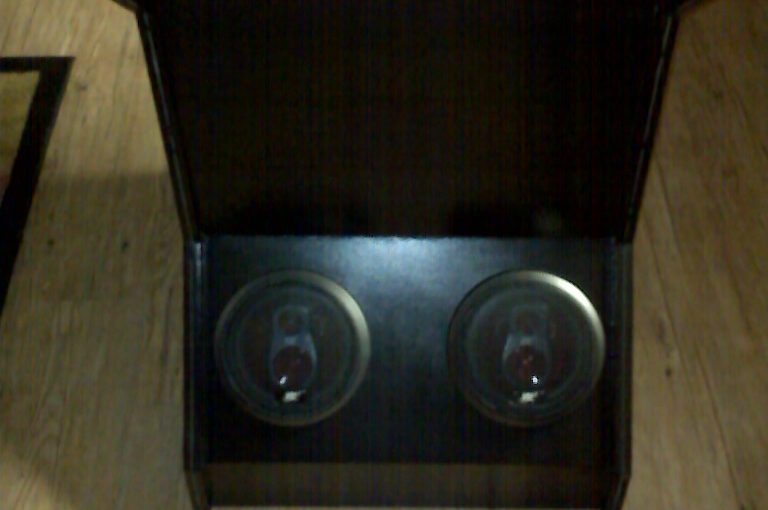
Installed two 6″ 3-way automotive speakers to into the base unit. Plan on installing 2 speakers in the top unit and a sub-woofer in the bottom.
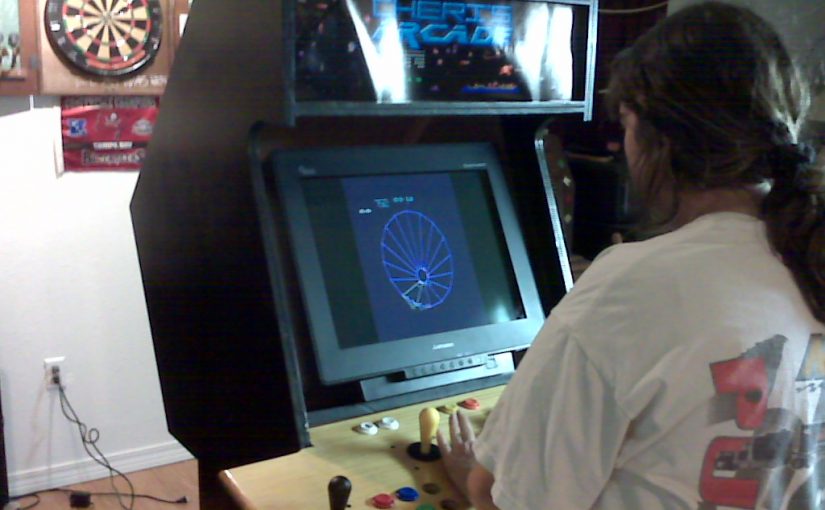
Cheri playing her first game of Tempest. The t-molding and bezel over the 22″ monitor has not been installed yet.
T-moulding installed! Getting it done… Slowly…
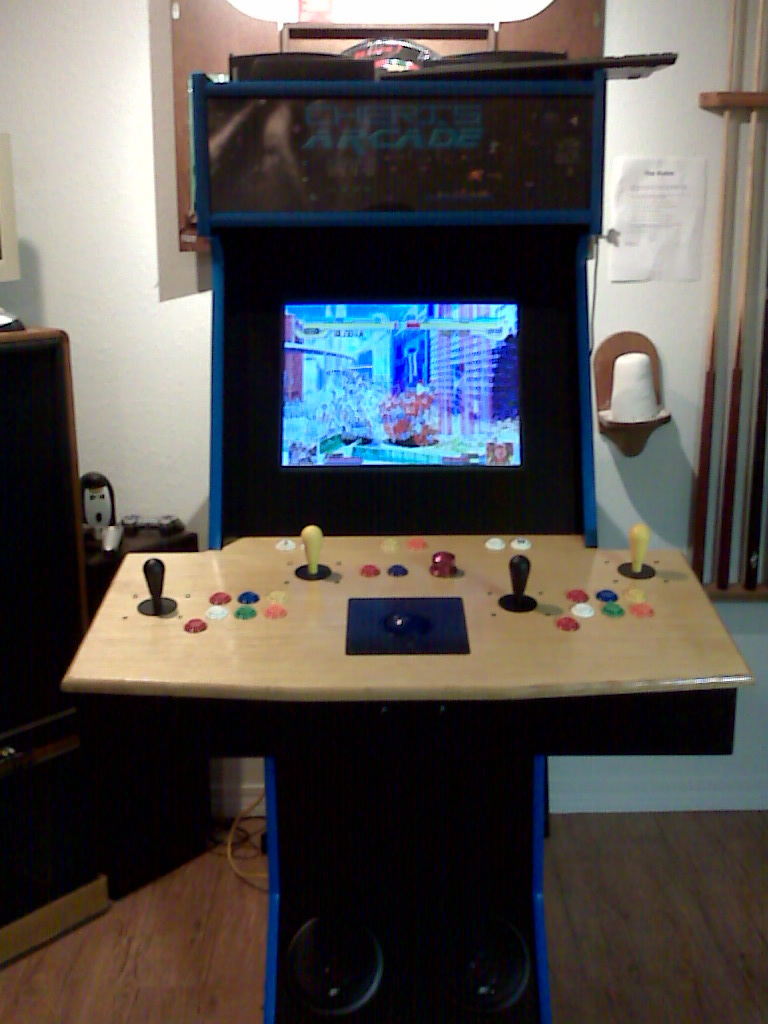
Bezel installed. What a pain in the ass that was! Broke two pieces that were suppose to be used for the marquee… Time for another trip to Lowes/Home Depot! All that needs to be done now is install the top unit speakers and install an on/off switch somewhere. Total time to this point? 18 days.